Spider plants (officially called Chlorphytum comosum) have long, arching leaves. They are known for their easy care and air-purifying abilities. As long as their basic needs are met, spider plants propagate quite easily, producing plant babies or pups that cascade down from the mother plant.
Their are a few different ways to propagate a spider plant. You can simply leave the babies as is, letting them grow off the mother plant as they trail down a hanging basket. These pups are basically mini spider plants. Or, you could cut the pups off and propagate them in soil or water.
There are three main methods to propagate spider plants:
- Root spider plant cuttings in soil while still attached to the mother plant
- Propagate spider plant cuttings in water
- Propagate spider plant cuttings in soil
For a complete guide to taking care of spider plants, check out this related article: Spider Plant Care Guide
To learn about spider plant propagation, continue reading:
Propagating Spider Plants
Spider plants send off “runners”, called stolons, that produce baby spider plants. You may chose to keep the new pups attached to the mother plant and have them grow off as they do in their natural habitat. As the babies come in contact with soil, they develop roots.
If you prefer to have a longer, trailing plant do not cut the pups off. Instead, place the pup in a smaller pot next to the mother plant while it is still attached. You do not need to dig the roots in- the starter roots only need to touch the soil. The mother plant will still be nurturing the spiderette during this time as it develops new roots.
Once the pup shows new growth, cut it off the parent and you now have two separate spider plants.
Propagating Spider Plant Pups in Water
With this method, you place a cutting in a jar of water, allowing the roots to develop and then plant it in the soil. Propagating in water is especially helpful because you can keep track of the roots as they grow in the water.
Propagate spider plant pups in water following these steps:
- Carefully cut the spider plant pup from the mother plant. Use a sanitized knife and cut right above where the pup attaches on the long stem. You can either cut off the long stem/stolon from the mother plant or leave it on as new pups can still grow from it.
- Fill a glass jar with water and place the cutting inside. The water should be deep enough to cover the very bottom of the spiderette. Do not let the leaves touch the water.
- Place the jar in a warm area with indirect sun to promote growth. Change out the water frequently.
- Once the roots have grown 1 to 2 inches long, they are ready to be transferred to soil. Fill a small pot with well-draining soil and plant the pup.
Planting spider plant pups
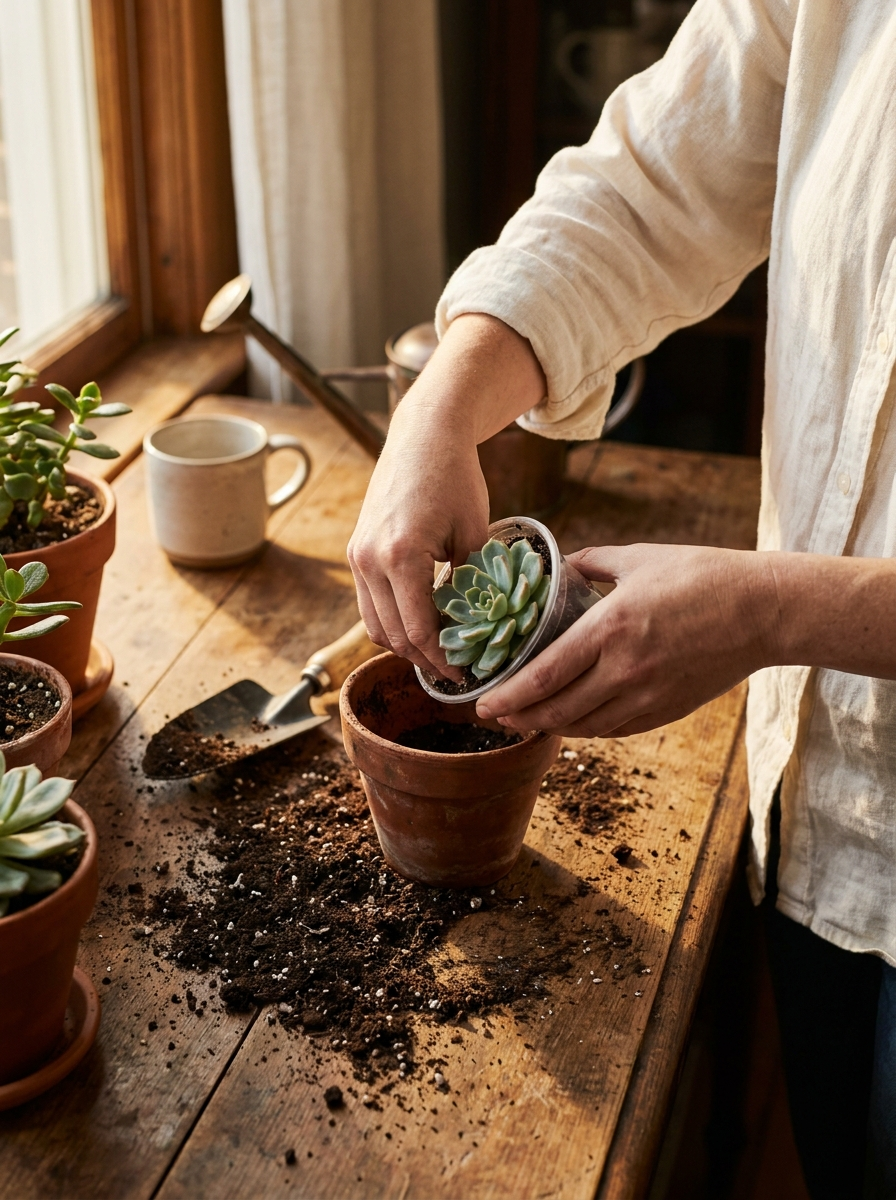
Once the cuttings are ready, plant them in a well-draining soil mixture. It is important to use a well-draining soil to prevent excess water retention. Mixing in perlite also improves drainage. Choose a terracotta pot with a drainage hole so that it does not retain extra water.
Fill the pot with enough soil to cover the roots. Press the soil firmly around the stems so they are supported. You can plant multiple cuttings in the same pot so that your plant appears fuller.
Place the new pot in a warm area with sunlight. Warmer temperatures and bright, indirect light encourage growth.
Give the plant a few weeks to firmly establish roots in the soil. Lightly tug on the plant and if there is resistance, the plant has taken root. If not, it still needs more time.
Propagating Spider Plants in Soil
Propagating in soil is the easiest method since you can just place the pup in soil and forget about it. However, it takes longer and you are unable to see the plant roots grow.
The benefit of the soil propagation method is that the roots will be stronger from the beginning (water grown roots tend to be weaker than those grown in soil) and do not need to establish themselves further.
To propagate your spider plant pups in the soil:
- Cut off the pup using a clean, sanitized pair of garden shears. Carefully remove the spiderette from the stolon by cutting right at the base.
- Take a pot filled with well-draining potting soil. Place the pup in the soil about half an inch inside the soil. Moisten the soil, but do not soak.
- Keep the pot in a warm location. Keep the soil slightly moist. Do not move the pup around or disturb the growth.
- Moisten the soil frequently.
It may take a little longer for your plant to grow roots this way compared to propagating in water, which is to be expected. Continue to keep the soil moist to promote new growth.
When to Propagate Spider Plants
While propagation can be done at any time during the year, it is best done during the spring to early summer months, which is the plant’s growing season.
General Spider Plant Care
Spider plants are one of the most popular houseplants due to their low maintenance nature. They thrive even if neglected, making them a good choice for busy plant parents.
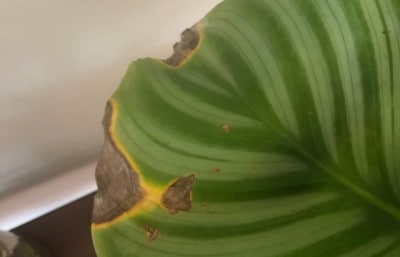
Plant your spider plant in well-draining soil and water once the top few inches of soil feel dry. Excessive watering will turn the leaves yellow and lead to rot. It is much easier to save an under watered spider plant than an over watered one, so water cautiously.
Provide your spider plant with bright, indirect light. While spider plants can tolerate low light, brighter light promotes growth. East or West-facing windows provide enough bright light that your spider plant needs. Avoid exposing the spider plant to harsh, direct sunlight as this can burn the leaves.
Spider plants thrive in warmer temperatures from 65 to 80 °F (18 to 27 °C). Avoid keeping the plant in colder temperatures.
As a bonus, the spider plant is non-toxic to pets.
In summary for spider plant propagation…
And those are three easy ways how to propagate a spider plant. Each of these methods is simple, effective, and can be repeated multiple times to grow your collection and give as gifts. With its long, slender leaves, the spider plant makes a wonderful addition to any hanging basket. Its low maintenance nature makes it a great choice even for new houseplant owners and most problems that arise are easily fixable.
Have other questions about spider plant propagation? Let me know in the comments down below!
Related Articles
Spider Plant Leaves Turning Yellow? 8 Reasons Why
Every guide here comes from things I've actually tried on my own plants. Got a plant doing something weird? Send me a photo — I answer every one.
Ask a plant question →